As noted before, laser tag actually is infrared tag. To be able to focus the infrared beam properly, you need a lens. The problem of choosing the right lens is discussed elsewhere, for example on the Arduino forum, at the Milestag DIY Laser pages and from a more theoretical viewpoint, here on a Caltech alumi page. Problem with all these pages is: where are you going to actually buy these lenses? I found it all too hard to find a lens with a well advertised focus length; a not too large diameter (it should look like a “gun”, right? A lens with a 60mm diameter could go for a rocket launcher, but not for a proper gun). Search for “LED lens” and you will find an endless stream of all sorts of LED enclosures with light dispersing capabilities.
Then, if you have the lenses, another problem comes up: you need to build an enclosure with your IR led at focus distance from the new lens. The milestag page above has some information about it and it is doable – but it’s a project all by itself.
Luckily, there is a much easier solution. Flashlight manufacturers have long overcome the whole problem, and it is trivial to buy a focusable led flashlight.
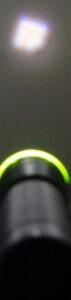
Do pay attention to the focus: you need a flashlight that will show a sharp picture of the LED chip on the wall. Seeing the image of the LED means focus distance – which, in turn, means your IR LED beam is focussed.
The picture on the left shows just that: you can almost see the chip structure as a projection on the wall (it’s a bit hard to capture by camera – but trust me: I could see the wire coming out of the LED structure).
Do note, that this is a regular, white light, flashlight, not an IR light. There are two ways of getting a proper IR flashlight: buy one; make one. In both cases, you are going to change the inner electronics of the light. Here is how.
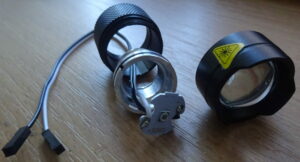
First, remove the lens structure:
Inside, there are two small boards: the LED and a boost converter. You need to remove the boost converter. If you have a white light flashlight, remove the LED as well and replace it with an IR one:
Some flashlights use plastic rings like in the video above, but I have also seen metal dish-like elements to hold the LED and there might be other ways.
If you have an IR LED flashlight, you are ready after removing the booster board. Re-insert the LED into the housing and be done.
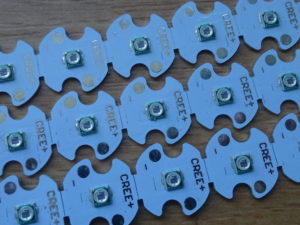
If you have a white flashlight, replace the LED with an infrared one:
(Oh, and if anyone has an idea to reuse boost converter boards – drop me a line. For now, I’m throwing them away).