Lately I bought a Minix Neo X7 Mini. Next thing you know: I brick the box. Here’s how to unbrick the thing – with Linux. It’s rather easy, too!
Last time I tried, the Neo X5 was just out and the same thing happened. Back then, I did not have time to dive into it. But luckily, things are different now.
Please note: this article is work in progress. If you have any questions, please drop me a note.
 Here’s the deal. The Minix Neo X7 “mini” is based on the Rockchip RK3188 chipset. As far as I understand, you cannot possibly “brick” (or “depth meter”, as I’m used to saying – you can still build a depth meter with it: drop it off a cliff and count the seconds until it touches the ground) these. The Rockchip processor has a trimmed down USB protocol on board, so you can always, always – even if there’s no NAND ROM left – flash it back. You won’t need special cables, JTAG stuff or soldering.
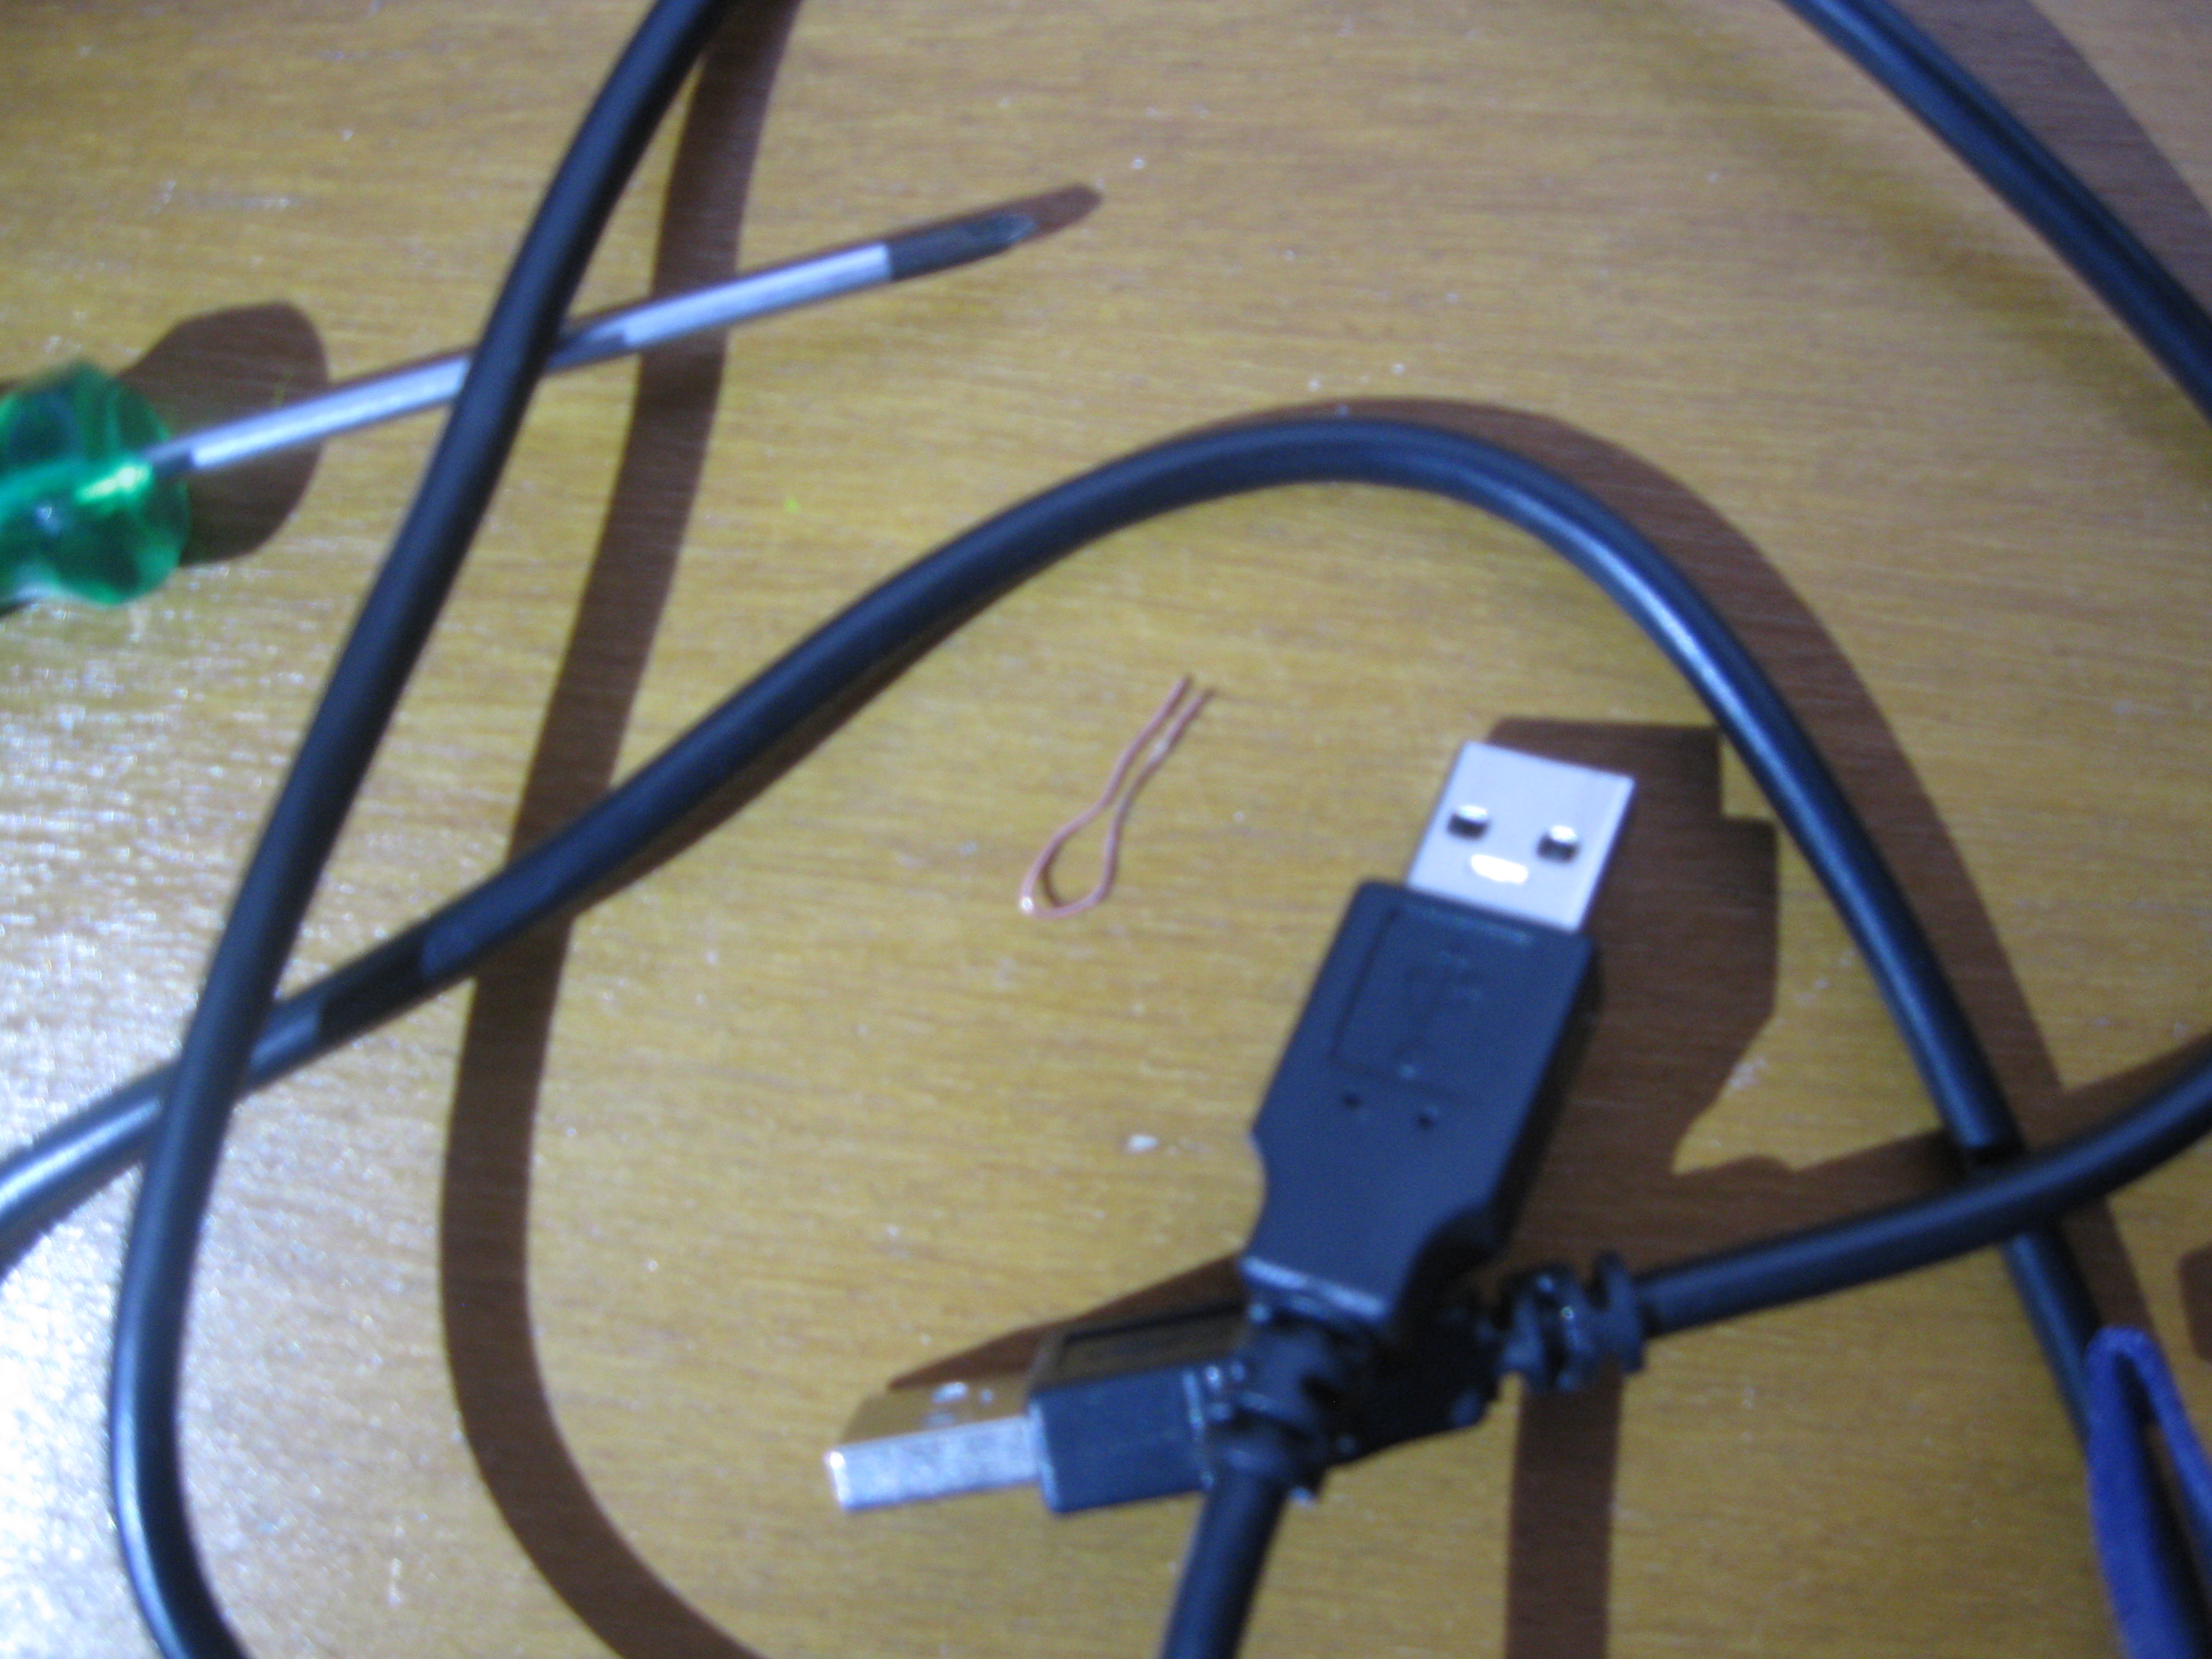
You only need the USB cable that’s included with the Neo X7 Mini, a screw driver, and a bit of wire (maybe a paper clip).
Dead? Or resting?
First, let’s check if your box is really, really dead. Start your Linux-computer. To see the list of connected USB-devices, open a terminal, type lsusb. Or, better, type watch -n 1 lsusb to see the list of USB-devices refresh every second.
Disconnect all cables from your X7 Mini. Then connect the USB cable to port 1 (the left port). Insert a pin or a paper clip in the small hole in the bottom of the X7 Mini to press the switch below. Still pressing the reset button, insert the power cable. Wait 5 seconds. If something like Bus 002 Device 005: ID 2207:310b (Bus and Device will differ, it’s the ID 2207:310b that we’re after) shows up in your list of USB devices, your Neo is not a brick – and you can proceed to flash a new image.
If nothing shows up, proceed below.
Unbricking
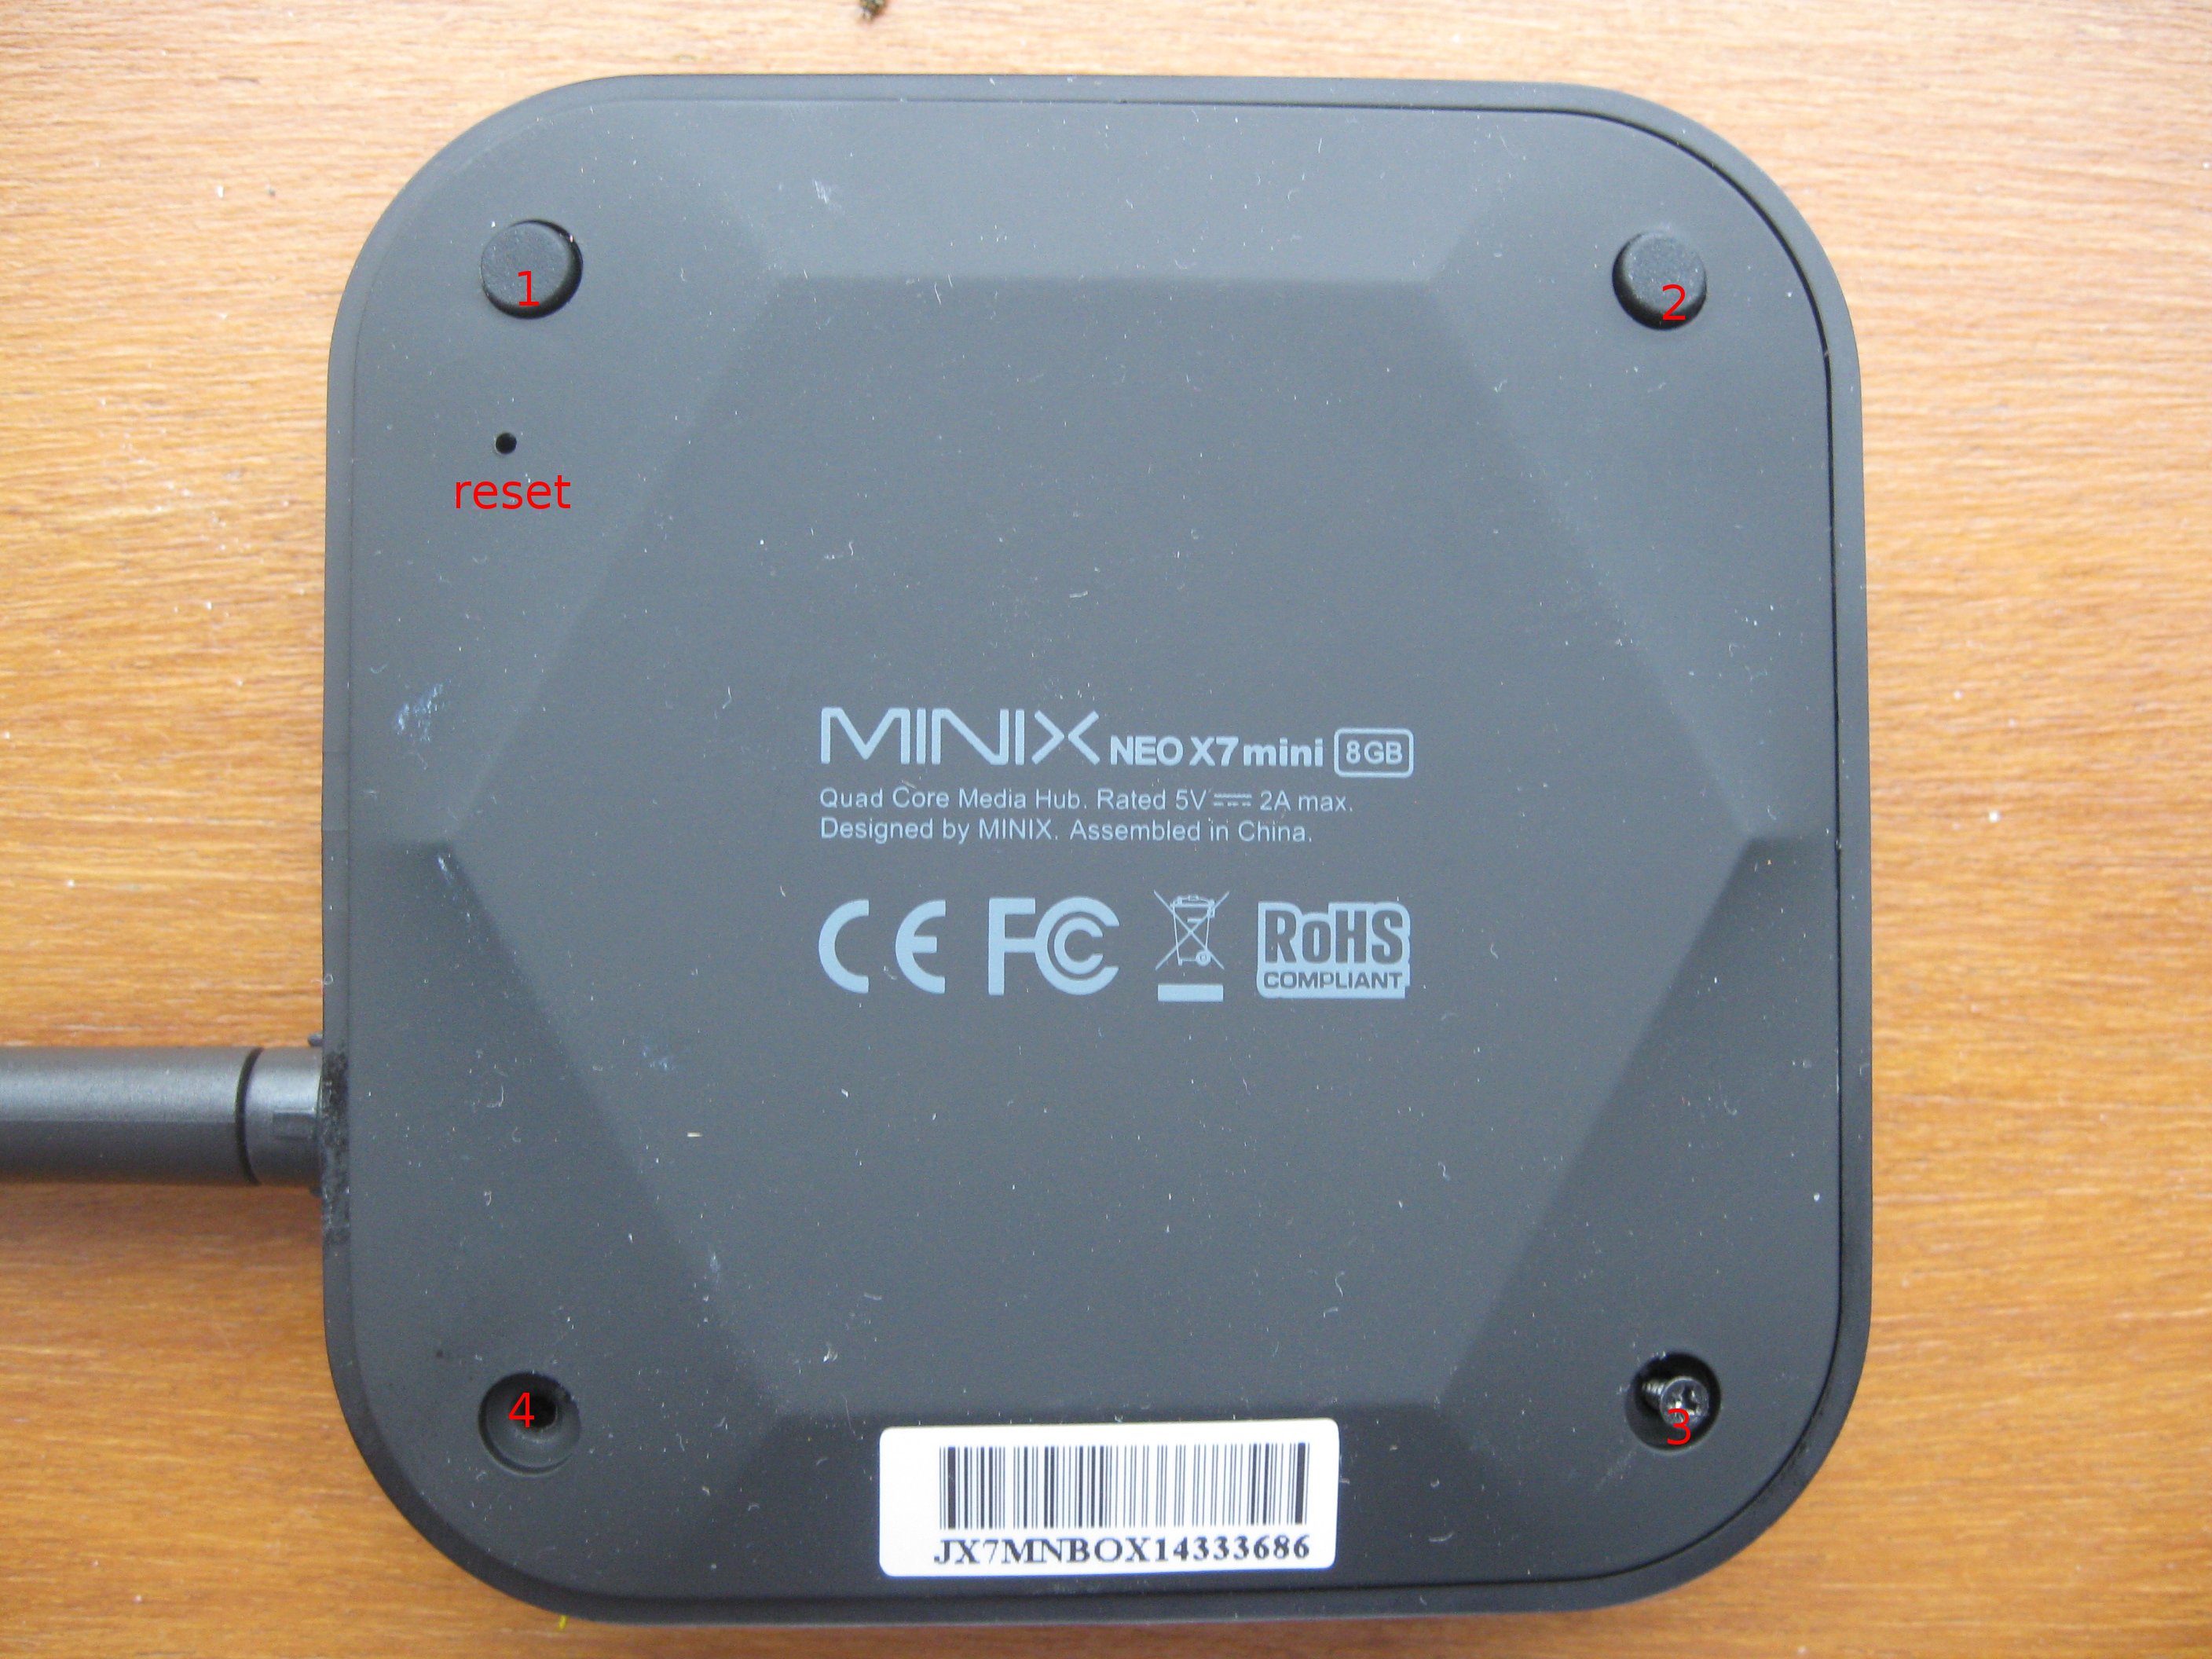 1) unscrew the box. There’s 4 screws below the rubber feet of the Minix Neo X7 Mini. Lift the bottom of the box – there are no plastic clamps, you should be able to get the box open really easily.
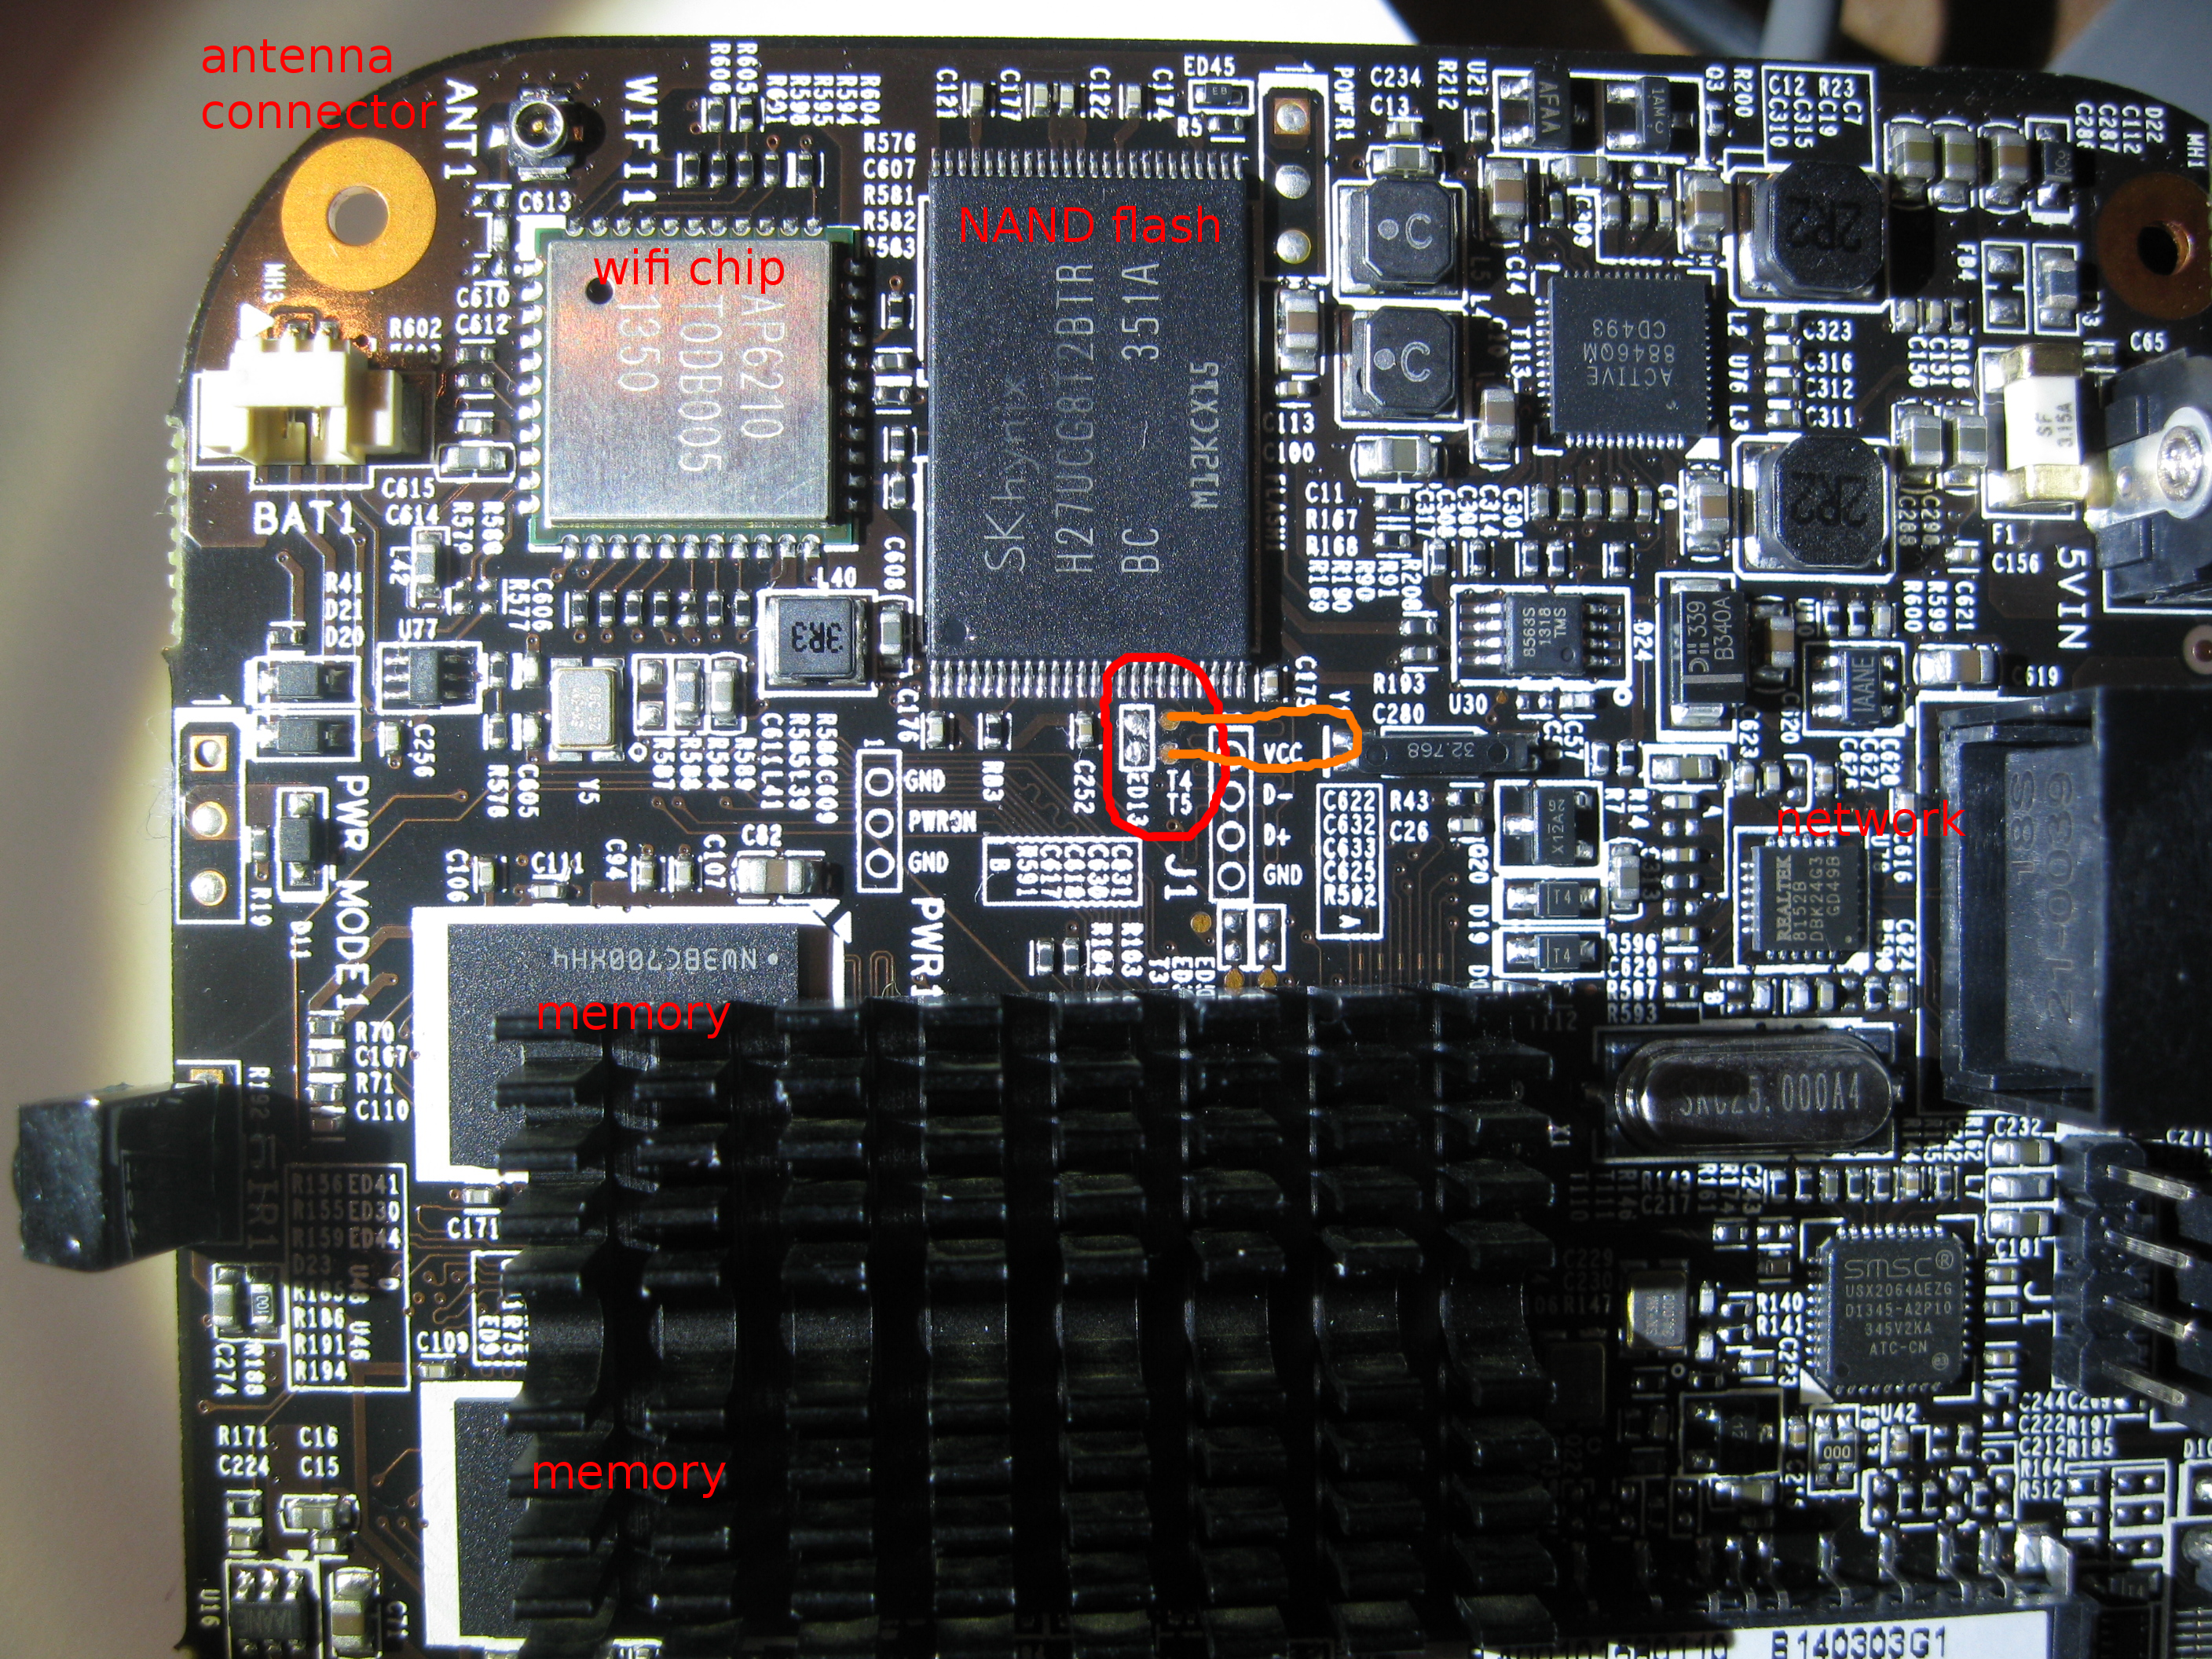
2) lift out the print board. Detach the antenna if you like.
3) locate the pads marked T4 and T5, next to the Hynix Flash chip.
Reattach the USB cable to USB port 1 (the leftmost). You may attach your HDMI cable, but it won’t help as there won’t be anything to display.
Now comes the hard part.
You need to connect T4 and T5. Please note, that it doesn’t matter if you connect T4 and T5 or the soldered pads marked ED13 – they’re connected so both should work. But theyre TINY little bastards and I found it all too easy to press a wire but not connect them.
Anyway, you connect T4 and T5 and while connecting, you connect the power cable. After about 4 seconds, ID 2207:310b will show up. If not, something went wrong (most likely, you did not really connect T4 and T5).
If you don’t see 2207:310b, then detach power cable; detach USB cable (because otherwise the X7 Mini can be powered by USB); count to 5; attach the USB cable again; connect T4 and T5 and connect the power cable again. Rinse, repeat, until you see ID 2207:310b in your device list.
Ready to rock!
Flashing
Download http://dl.radxa.com/rock/tools/linux/Linux_Upgrade_Tool_v1.16.zip and unpack it. In a terminal, run sudo ./upgrade_tool.
It will show:
DevNo=1 Vid=0x2207,Pid=0x310b,LocationID=205 Maskrom
Hey, it’s working! Enter q to quit upgrade_tool again.
Now download the latest X7mini ROM from Minix. You can find it in the list here. At the time of writing, it’s here: http://www.minix.com.hk/firmware/NEO_X7mini_20140211.rar
Unpack it with “unrar” (or with file-roller or anything else).
Type:
sudo ./upgrade_tool uf images/X7mini_20140211_OTA.img
In my case, this wasn’t enough the first time – I had to run this command a second time from within “loader” mode – where you press the reset button while powering up and upgrade_tool finds
DevNo=1 Vid=0x2207,Pid=0x310b,LocationID=208 Loader
But after that: it worked!
Excellent tutorial!!! Many thanks for the guidance.
Thank you so much!! Windows was killing me with driver issues (I think). I’ve flashed my g4, x5, and x7 mini before and now a few months later I can’t for the life of me get two different W7 machines to recognize the x7 mini. Linux VM and your great guide to the rescue!!
Thank you, you saved my day 😉
I followed the same instructions for a X5-mini and it worked perfectly, during the update from 4.1 to 4.2 something went wrong and it was not possible to update or reinstall with the official tool, but your instructions worked fine.
The device was not totally bricked, it just showed the glowing Minix logo but not starting.